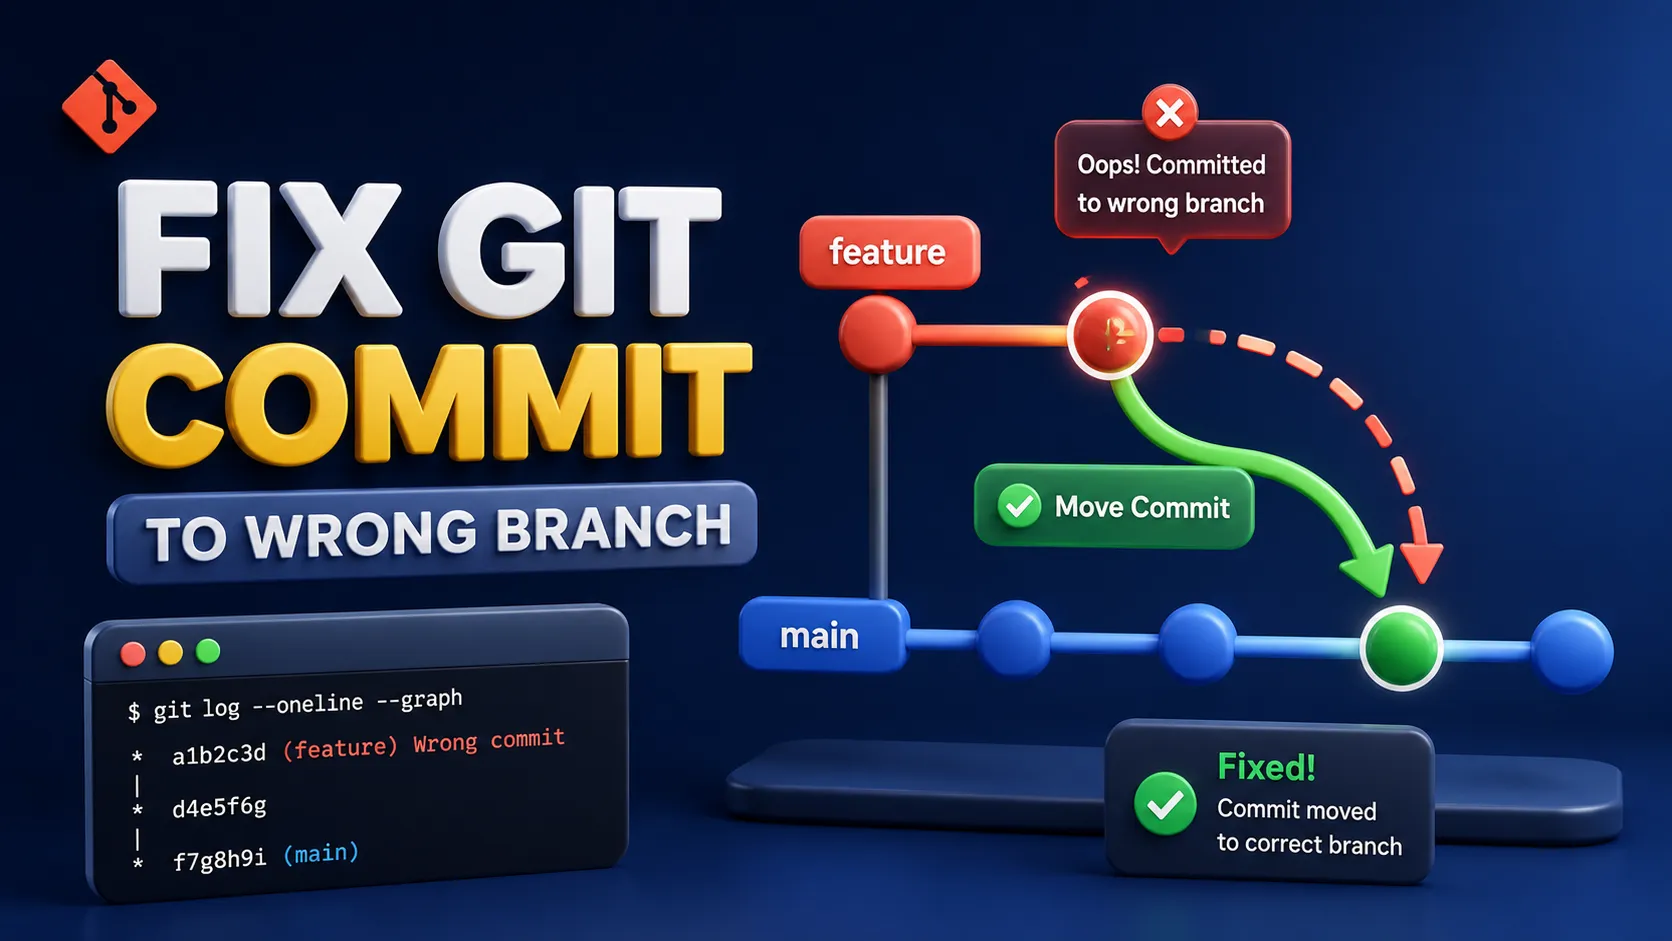
I know you’ve been there. You are deep in the "flow," writing code, and hitting git commit with confidence. Then, you look at your terminal and realize the mistake: you just made a git commit to wrong branch. Specifically, you’ve pushed feature code directly onto the main or master branch.
Don't panic. This is a rite of passage for every developer. Whether you forgot to switch branches or your IDE defaulted to master, it is easily fixable. In this guide, I shall show you how to safely move those commits to a feature branch and restore order to your repository.
The Common Git Mistake Developers Make
Git is a powerful version control system, but its flexibility means it doesn't always stop us from making mistakes. Most junior developers start their work in the master or main branch because it’s the default state of a new repository.
Accidentally committing to the wrong branch usually happens because:
- You forgot to run
git checkout -b <branch-name>. - You switched tasks quickly and didn't check your current branch status.
- You assumed you were on a feature branch when you were actually on the primary production branch.
Whatever the reason, the result is the same: your feature code is now part of the main branch history, which can lead to issues in production and complicate collaboration with other developers.
Example Scenario (Real Situation)
Let's look at a common scenario. Imagine you are building a website:
- You initialize a Git repository and commit your
index.htmltomasterormain. This is correct. - You start working on a "Login" feature.
- Without switching branches, you create
login.html, write the API integration. - You made two commits: "add login.html" and "add authentication".
Now, your production-ready master branch contains experimental, unreviewed feature code. You need to move those "Login" commits to a branch called feature-login and remove them from master.
Step 1 – Identify the Mistake Using Git Logs
Before you move anything, you need to see exactly what happened. We use the log command to visualize the commit history. (You're in master branch yet)
Run the following command:
git log --oneline --all --graph
What this does:
--oneline: Condenses the output so each commit is one line.--all: Shows all branches, not just the one you are on.--graph: Draws a text-based graphical representation of the branch history.
# example output of the above command:
* a781459 (HEAD -> main) add authentication
* c00ffa3 add login.html
* a6567f9 update index.html
* 4f1c99f add index.html
Look for the most recent commits on master. You will see the "add authentication" commit at the top. Note that each commit has a unique 7-character ID (the "hash"), such as a1b2c3d.
Step 2 – Copy the Commit IDs
To move your work to the correct feature branch, Git needs to know exactly which commits you are talking about. Identify the hashes of the commits that belong in the feature branch.
If you made three commits to the wrong branch, you need the hashes for all three. In our scenario, the hashes for "add login" and "add authentication" are c00ffa3 and a781459.
Tip: Always copy the hashes into a notepad or keep your terminal window open so you don't lose them!
Step 3 – Switch to the Correct Feature Branch
Now, you need to go where the code should have gone. If the branch doesn't exist yet, create it and switch to it.
git checkout -b feature-login
Step 4 – Move Commits Using git cherry-pick
The "magic" command here is git cherry-pick. This command takes a commit from one place and applies it to another.
Run the command using the hash you identified in Step 2:
git cherry-pick c00ffa3
git cherry-pick a781459
# After cherry-picking
* a781459 (HEAD -> feature-login, main) add authentication
* c00ffa3 add login.html
* a6567f9 update index.html
* 4f1c99f add index.html
Important Note: If you have multiple commits to move, apply them in chronological order (oldest first). This prevents merge conflicts and keeps your history logical.
git cherry-pick essentially "copies" the changes. Your "Login" code is now safely on the feature-login branch. However, a copy still exists on master. We need to fix that next.
Step 5 – Clean the Master Branch
Now that your work is safe on the correct branch, we must remove the accidental commits from the master branch.
First, switch back to master:
git checkout master
Then, use the reset command to roll back the branch to its state before the mistake:
git reset --hard HEAD~2
What this command does:
git reset: Moves the current branch pointer to a previous state.--hard: This tells Git to discard all changes in the working directory. It makes master look exactly like it did before you made that mistake.HEAD~2: This tells Git to go back exactly two commits. If you made three accidental commits, you would useHEAD~3.
# After reset
* a781459 (feature-login) add authentication
* c00ffa3 add login.html
* a6567f9 (HEAD -> main) update index.html
* 4f1c99f add index.html
Use --hard with caution. Any uncommitted work in your directory will be permanently deleted. Always ensure your git status is clean before running this.
When Should You Use git cherry-pick?
Beyond fixing mistakes, git cherry-pick is useful in several real-world situations:
- Hotfixes: When a bug is fixed on a development branch but needs to be applied to the production branch immediately.
- Undoing a Revert: If a feature was reverted but you want to bring back specific parts of it.
- Collaborative Work: If a teammate wrote a helper function on their branch that you need on yours.
Quick Summary
Need to fix a git commit to wrong branch in 30 seconds? I know you don't have time. Here is the cheat sheet:
- Find the commit hash:
git log --oneline - Go to the right branch:
git checkout feature-branch - Copy the work over:
git cherry-pick <commit-hash> - Go back to master:
git checkout master - Erase the mistake:
git reset --hard HEAD~1
Conclusion
Fixing a git commit to wrong branch is a foundational skill that transforms you from a panicked beginner into a confident developer.
The next time you realize you're on the wrong branch, don't delete your folder and start over. Use the steps above to move your code like a pro.
Thanks for reading!


